Search

Budget-Friendly Vegan Eating: Tips and Tricks for Saving Money

How to Eat Vegan on a Budget: Practical Tips for Savvy Shoppers

Eating a vegan diet doesn’t have to break the bank. With careful planning and smart choices, you can enjoy wholesome, nutritious meals without overspending. This blog post delves into effective strategies to help you eat vegan on a budget while ensuring you consume a balanced diet.

Plan Your Meals

Planning your meals in advance is crucial to managing your food expenses. Here are some steps to help you efficiently plan your meals:

  • Make a Weekly Menu: Outline what you will eat for breakfast, lunch, dinner, and snacks. Include simple and nutritious recipes that use affordable ingredients.
  • Create a Shopping List: Based on your menu, draft a shopping list. Stick to this list to avoid impulse buying.
  • Batch Cooking: Cook large portions of meals and freeze them for future use. This saves both time and money.

Shop Smart

Making wise shopping decisions can drastically cut down your grocery bills. Consider these tips:

  • Buy in Bulk: Purchase grains, beans, and legumes in bulk. They are cost-effective and have a long shelf life.
  • Store Brands: Opt for store-brand products. They are usually cheaper than name brands but offer similar quality.
  • Seasonal Produce: Choose fruits and vegetables that are in season. They are often cheaper and fresher.
  • Discount Stores: Shop at discount grocery stores and farmers markets for the best deals on produce and packaged goods.

Make Your Own

Preparing food from scratch not only ensures you know what goes into your meals but also saves you money. Here are some ideas:

  • Homemade Snacks: Instead of buying expensive vegan snacks, make your own granola bars, trail mix, or popcorn.
  • DIY Plant Milks: Make your own almond, oat, or soy milk at home. It’s cheaper and allows you to control the ingredients.
  • Canned Goods: Prepare and can your own sauces, soups, and beans. It’s a great way to use up excess produce and save money.

Utilize Budget-Friendly Ingredients

Certain ingredients are both budget-friendly and central to a vegan diet. Incorporate more of these items into your meals:

  • Beans and Lentils: Packed with protein and fiber, beans and lentils are versatile and inexpensive.
  • Whole Grains: Brown rice, quinoa, and oats are great bases for meals and are cost-effective.
  • Frozen Vegetables: They are just as nutritious as fresh vegetables and typically cheaper.
  • Seasoning and Spices: Invest in a variety of spices to enhance the flavor of simple and boring dishes, making meals more enjoyable.

Reduce Food Waste

Wasting food is equivalent to wasting money. Here’s how you can reduce food waste while following a vegan diet:

  • Proper Storage: Store your fruits and vegetables correctly to extend their shelf life.
  • Use Leftovers: Get creative with leftovers. Use them in new recipes instead of letting them go to waste.
  • Composting: If you do end up with scraps, compost them to return nutrients to the soil for future gardening.

Find Affordable Vegan Recipes

Look for recipes that are high on nutrition but low on cost. Here are some recommendations:

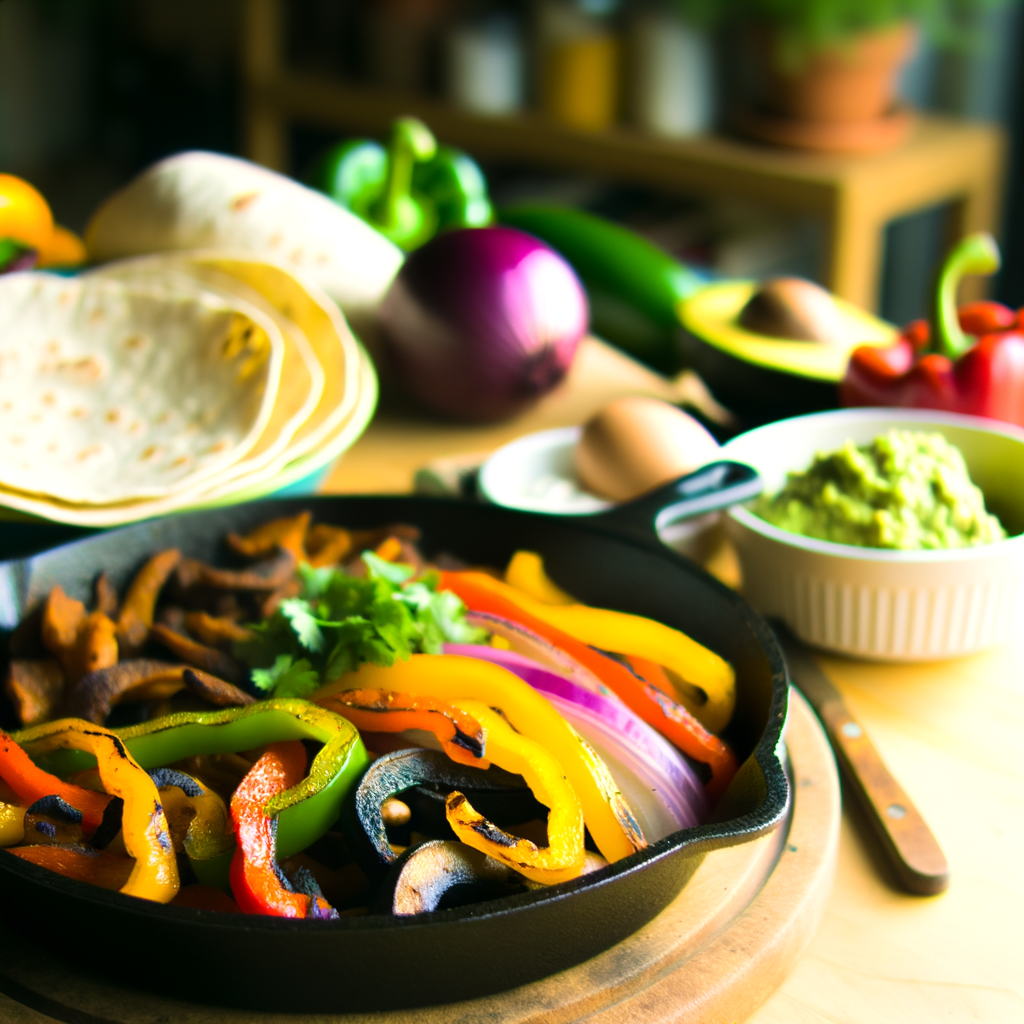
  • Simple Stir-Fry: Use an array of affordable vegetables, tofu, and a basic stir-fry sauce.
  • Hearty Soups and Stews: Beans and root vegetables make an economical and filling soup or stew.
  • Salads with Grains: Mix whole grains like quinoa or bulgur with fresh vegetables for a nutritious, balanced meal.

Supplement Wisely

While a balanced vegan diet can provide most nutrients, there are some that might need supplementation:

  • Vitamin B12: Look for affordable B12 supplements or fortified foods.
  • Iron: Plant-based iron sources include lentils, chickpeas, seeds, and dark leafy greens paired with vitamin C-rich foods to enhance absorption.
  • Omega-3 Fatty Acids: Consider flaxseeds, chia seeds, or algae-based supplements for omega-3s.

Take Advantage of Community Resources

Sometimes, community resources can provide added savings:

  • Community Gardens: Participate in local community gardens where you can grow your produce.
  • Food Co-Ops: Join a food cooperative to access lower-priced organic and local foods.
  • Food Banks: If necessary, don’t hesitate to reach out to local food banks that may provide vegan-friendly options.

Adopting a vegan lifestyle on a budget is entirely doable with some planning and resourcefulness. By following the tips above, you can enjoy nutritious, plant-based meals without putting a strain on your wallet.

Get our best recipes & expert tips right into your inbox!

Join over 10k subscribers

By submitting above, you agree to our privacy policy.

You might also like

Delicious Homemade Almond Milk Yogurt Recipe Using Instant Pot --- Are you in search of a dairy-free yogurt alternative that's both delicious and healthy? Look no further! With the help of your Instant Pot, you can now create perfectly creamy almond milk yogurt at home. Not only is this homemade version free from additives and preservatives, but it's also incredibly easy to make. Here's a step-by-step guide to get you started on your culinary adventure. ### Ingredients You’ll Need: - 4 cups of unsweetened almond milk - 1-2 tablespoons of agar-agar or gelatin (for thickening) - 2 tablespoons of probiotic yogurt starter or dairy-free yogurt - 1-2 tablespoons of maple syrup or honey (optional) ### Equipment: - Instant Pot with yogurt setting - Whisk - Instant Pot-compatible glass jars (optional but recommended) ### Step-by-Step Instructions: #### 1. Prepare the Almond Milk Mixture Firstly, pour the unsweetened almond milk into your Instant Pot. If you’re using agar-agar or gelatin, sprinkle it into the almond milk. Whisk the mixture thoroughly to ensure that the thickening agent is well-dissolved. This step is crucial for getting the right yogurt consistency. #### 2. Heat the Mixture Set your Instant Pot to the 'Saute' setting to heat the almond milk mixture. Stir frequently to prevent the milk from scorching. Heat until the mixture reaches approximately 185°F (85°C). This process helps to break down proteins and ensure consistency. #### 3. Cool the Mixture Turn off the Instant Pot and allow the almond milk mixture to cool down to about 110°F (43°C). You can speed up this process by placing the inner pot in a cold water bath. Use a thermometer to check the temperature - this is important as adding the yogurt starter to a mixture that's too hot can kill the beneficial bacteria. #### 4. Add the Yogurt Starter Once the mixture cooled to the appropriate temperature, add the probiotic yogurt starter or dairy-free yogurt. Whisk thoroughly to ensure the starter is evenly distributed. Adding sweetener at this stage is optional but can enhance the flavor of your yogurt. #### 5. Incubate the Yogurt Select the 'Yogurt' setting on your Instant Pot. Secure the lid (no need to seal, as pressure is not required) and set the time for 8-12 hours. Longer incubation results in tangier yogurt. You can use Instant Pot-compatible glass jars at this stage for convenient storage later. #### 6. Chill and Enjoy Once the incubation period is complete, carefully transfer the yogurt into glass containers and refrigerate for at least 4 hours. This chilling period helps the yogurt to set properly. ### Tips for Perfect Homemade Almond Milk Yogurt: - Use unsweetened almond milk for best results. - Ensure your Instant Pot and utensils are thoroughly clean to avoid contamination. - Experiment with different incubation times to find your perfect tanginess level. ### Conclusion Making almond milk yogurt at home using an Instant Pot is a rewarding and straightforward process. This dairy-free delight is perfect for those with dietary restrictions or anyone looking to enjoy a healthier yogurt alternative. Give it a try, and you might never go back to store-bought yogurt again. Happy yogurt-making!

Delicious Homemade Almond Milk Yogurt Recipe Using Instant Pot — Are you in search of a dairy-free yogurt alternative that’s both delicious and healthy? Look no further! With the help of your Instant Pot, you can now create perfectly creamy almond milk yogurt at home. Not only is this homemade version free from additives and preservatives, but it’s also incredibly easy to make. Here’s a step-by-step guide to get you started on your culinary adventure. ### Ingredients You’ll Need: – 4 cups of unsweetened almond milk – 1-2 tablespoons of agar-agar or gelatin (for thickening) – 2 tablespoons of probiotic yogurt starter or dairy-free yogurt – 1-2 tablespoons of maple syrup or honey (optional) ### Equipment: – Instant Pot with yogurt setting – Whisk – Instant Pot-compatible glass jars (optional but recommended) ### Step-by-Step Instructions: #### 1. Prepare the Almond Milk Mixture Firstly, pour the unsweetened almond milk into your Instant Pot. If you’re using agar-agar or gelatin, sprinkle it into the almond milk. Whisk the mixture thoroughly to ensure that the thickening agent is well-dissolved. This step is crucial for getting the right yogurt consistency. #### 2. Heat the Mixture Set your Instant Pot to the ‘Saute’ setting to heat the almond milk mixture. Stir frequently to prevent the milk from scorching. Heat until the mixture reaches approximately 185°F (85°C). This process helps to break down proteins and ensure consistency. #### 3. Cool the Mixture Turn off the Instant Pot and allow the almond milk mixture to cool down to about 110°F (43°C). You can speed up this process by placing the inner pot in a cold water bath. Use a thermometer to check the temperature – this is important as adding the yogurt starter to a mixture that’s too hot can kill the beneficial bacteria. #### 4. Add the Yogurt Starter Once the mixture cooled to the appropriate temperature, add the probiotic yogurt starter or dairy-free yogurt. Whisk thoroughly to ensure the starter is evenly distributed. Adding sweetener at this stage is optional but can enhance the flavor of your yogurt. #### 5. Incubate the Yogurt Select the ‘Yogurt’ setting on your Instant Pot. Secure the lid (no need to seal, as pressure is not required) and set the time for 8-12 hours. Longer incubation results in tangier yogurt. You can use Instant Pot-compatible glass jars at this stage for convenient storage later. #### 6. Chill and Enjoy Once the incubation period is complete, carefully transfer the yogurt into glass containers and refrigerate for at least 4 hours. This chilling period helps the yogurt to set properly. ### Tips for Perfect Homemade Almond Milk Yogurt: – Use unsweetened almond milk for best results. – Ensure your Instant Pot and utensils are thoroughly clean to avoid contamination. – Experiment with different incubation times to find your perfect tanginess level. ### Conclusion Making almond milk yogurt at home using an Instant Pot is a rewarding and straightforward process. This dairy-free delight is perfect for those with dietary restrictions or anyone looking to enjoy a healthier yogurt alternative. Give it a try, and you might never go back to store-bought yogurt again. Happy yogurt-making!