Search

Ultimate Guide to Creating Delicious Dairy-Free Ice Cream at Home

Level Up Your Vegan Ice Cream Game: Expert Tips for Creamy, Delicious Results

Creating rich and creamy vegan ice cream at home can be a delightful challenge. Whether you are new to the world of plant-based desserts or an experienced vegan chef, these expert tips will help you achieve the perfect vegan ice cream every time.

Choosing the Right Base

The base of your vegan ice cream is crucial for texture and flavor. Here are some popular options to consider:
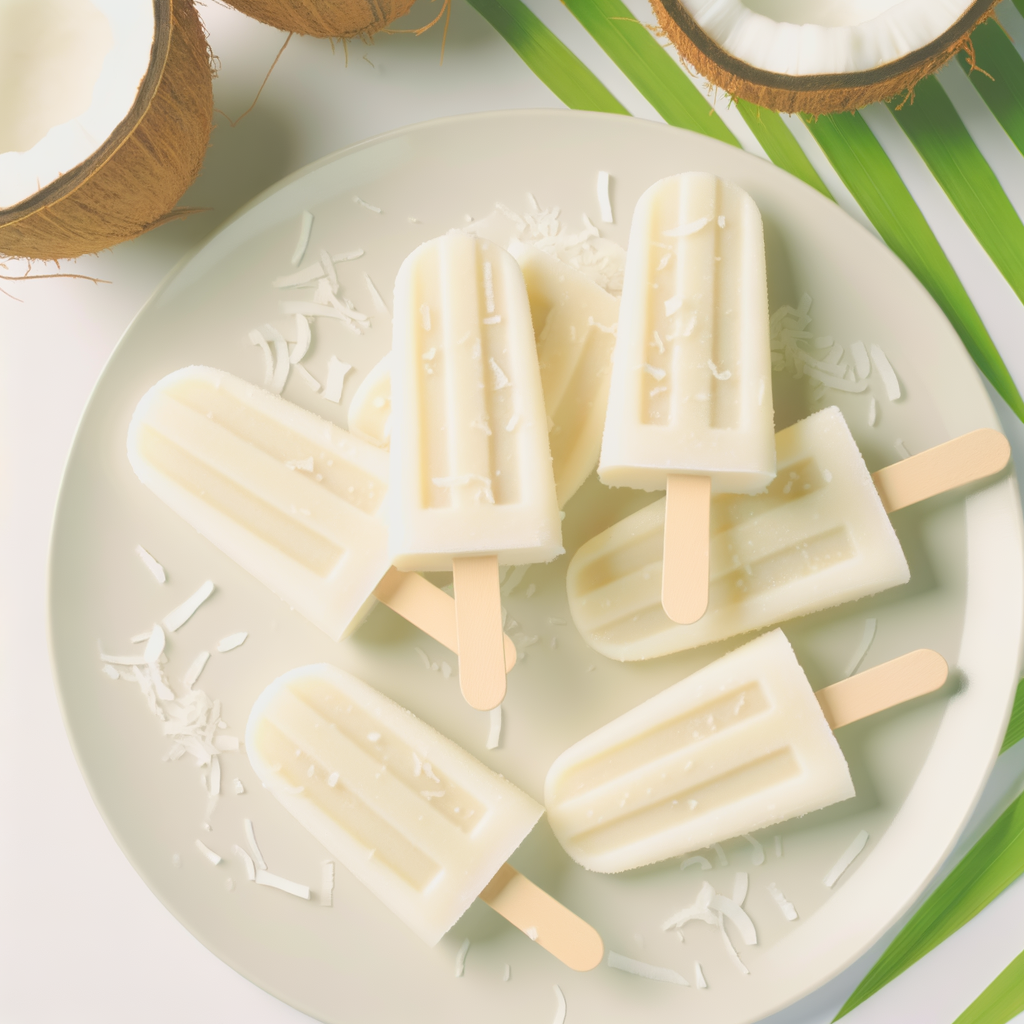
Coconut Milk

Coconut milk is a favorite due to its rich and creamy texture. Full-fat coconut milk or coconut cream yields the best results.

  • Pro tip: Chill the coconut milk cans overnight and scoop only the creamy part, leaving the watery residue.

Cashew Milk

Cashew milk provides a neutral base, allowing other flavors to shine. It’s thick and creamy, ideal for a luscious vegan ice cream.

  • Pro tip: Soak cashews overnight and blend them with water for a smooth and creamy milk.

Almond Milk

Almond milk is lighter and less creamy compared to coconut or cashew milk, but it still makes a delicious, nutty ice cream.

  • Pro tip: Use a thickener like guar gum or cornstarch to improve the creaminess.

Sweeteners: Natural & Delicious

Choosing the right sweetener can make a significant difference in your vegan ice cream’s flavor. Here are some popular choices:

Maple Syrup

Maple syrup adds a subtle caramel flavor and blends well with most plant-based milk.

Agave Syrup

Agave syrup has a lighter consistency and works well for those who prefer a less pronounced sweetener.

Dates

Blended dates provide natural sweetness and a caramel-like flavor.

  • Pro tip: Boil dates in a bit of water until they are soft before blending for a smoother texture.

Flavoring Your Vegan Ice Cream

Flexibility in flavoring is one of the best aspects of making vegan ice cream. Here are some ideas to get creative with:

Fruit Purees

Strawberries, mangoes, and bananas can be pureed and added to the base for a fruity twist.

  • Pro tip: Cook the fruit down into a thicker puree to prevent ice crystals from forming.

Chocolate

Mix in cocoa powder or melted vegan chocolate to create rich, decadent flavors.

  • Pro tip: Use high-quality dark chocolate for a more intense flavor profile.

Natural Extracts

Vanilla, almond, and peppermint extracts can lift your vegan ice cream to new heights.

  • Pro tip: Start with a small amount and gradually increase to avoid overpowering the base.

Making the Ice Cream

Once you’ve prepared your base and selected your flavorings and sweeteners, it’s time to make the ice cream. Follow these steps for the best results:

Blend Thoroughly

Blend all the ingredients thoroughly to ensure a smooth and creamy texture. Any chunks can freeze and disrupt the texture of the final product.

Chill the Mixture

Let the blended mixture chill in the refrigerator for at least 4 hours or overnight. This ensures that the mixture is cold enough to churn properly.

Churn to Perfection

If you have an ice cream maker, follow the manufacturer’s instructions. If you don’t have one, pour the mixture into a shallow pan, freeze, and stir every 30 minutes until smooth and scoopable.

  • Pro tip: Avoid over-churning as it can cause the ice cream to become icy.

Storing Your Vegan Ice Cream

Proper storage preserves the texture and flavor of your vegan ice cream. Here are some tips:

Transfer to an Airtight Container

Use an airtight container to store your vegan ice cream. Press a piece of parchment paper onto the surface to prevent ice crystals from forming.

Let It Soften Before Serving

Allow the ice cream to sit at room temperature for 10-15 minutes before scooping to achieve the perfect scooping consistency.

Enjoy your homemade vegan ice cream as a delicious dessert or a refreshing treat on a hot day. With these tips, you can experiment with various flavors and ingredients to create the perfect vegan ice cream tailored to your taste.

Happy churning!

Get our best recipes & expert tips right into your inbox!

Join over 10k subscribers

By submitting above, you agree to our privacy policy.

You might also like

Delicious Homemade Almond Milk Yogurt Recipe Using Instant Pot --- Are you in search of a dairy-free yogurt alternative that's both delicious and healthy? Look no further! With the help of your Instant Pot, you can now create perfectly creamy almond milk yogurt at home. Not only is this homemade version free from additives and preservatives, but it's also incredibly easy to make. Here's a step-by-step guide to get you started on your culinary adventure. ### Ingredients You’ll Need: - 4 cups of unsweetened almond milk - 1-2 tablespoons of agar-agar or gelatin (for thickening) - 2 tablespoons of probiotic yogurt starter or dairy-free yogurt - 1-2 tablespoons of maple syrup or honey (optional) ### Equipment: - Instant Pot with yogurt setting - Whisk - Instant Pot-compatible glass jars (optional but recommended) ### Step-by-Step Instructions: #### 1. Prepare the Almond Milk Mixture Firstly, pour the unsweetened almond milk into your Instant Pot. If you’re using agar-agar or gelatin, sprinkle it into the almond milk. Whisk the mixture thoroughly to ensure that the thickening agent is well-dissolved. This step is crucial for getting the right yogurt consistency. #### 2. Heat the Mixture Set your Instant Pot to the 'Saute' setting to heat the almond milk mixture. Stir frequently to prevent the milk from scorching. Heat until the mixture reaches approximately 185°F (85°C). This process helps to break down proteins and ensure consistency. #### 3. Cool the Mixture Turn off the Instant Pot and allow the almond milk mixture to cool down to about 110°F (43°C). You can speed up this process by placing the inner pot in a cold water bath. Use a thermometer to check the temperature - this is important as adding the yogurt starter to a mixture that's too hot can kill the beneficial bacteria. #### 4. Add the Yogurt Starter Once the mixture cooled to the appropriate temperature, add the probiotic yogurt starter or dairy-free yogurt. Whisk thoroughly to ensure the starter is evenly distributed. Adding sweetener at this stage is optional but can enhance the flavor of your yogurt. #### 5. Incubate the Yogurt Select the 'Yogurt' setting on your Instant Pot. Secure the lid (no need to seal, as pressure is not required) and set the time for 8-12 hours. Longer incubation results in tangier yogurt. You can use Instant Pot-compatible glass jars at this stage for convenient storage later. #### 6. Chill and Enjoy Once the incubation period is complete, carefully transfer the yogurt into glass containers and refrigerate for at least 4 hours. This chilling period helps the yogurt to set properly. ### Tips for Perfect Homemade Almond Milk Yogurt: - Use unsweetened almond milk for best results. - Ensure your Instant Pot and utensils are thoroughly clean to avoid contamination. - Experiment with different incubation times to find your perfect tanginess level. ### Conclusion Making almond milk yogurt at home using an Instant Pot is a rewarding and straightforward process. This dairy-free delight is perfect for those with dietary restrictions or anyone looking to enjoy a healthier yogurt alternative. Give it a try, and you might never go back to store-bought yogurt again. Happy yogurt-making!

Delicious Homemade Almond Milk Yogurt Recipe Using Instant Pot — Are you in search of a dairy-free yogurt alternative that’s both delicious and healthy? Look no further! With the help of your Instant Pot, you can now create perfectly creamy almond milk yogurt at home. Not only is this homemade version free from additives and preservatives, but it’s also incredibly easy to make. Here’s a step-by-step guide to get you started on your culinary adventure. ### Ingredients You’ll Need: – 4 cups of unsweetened almond milk – 1-2 tablespoons of agar-agar or gelatin (for thickening) – 2 tablespoons of probiotic yogurt starter or dairy-free yogurt – 1-2 tablespoons of maple syrup or honey (optional) ### Equipment: – Instant Pot with yogurt setting – Whisk – Instant Pot-compatible glass jars (optional but recommended) ### Step-by-Step Instructions: #### 1. Prepare the Almond Milk Mixture Firstly, pour the unsweetened almond milk into your Instant Pot. If you’re using agar-agar or gelatin, sprinkle it into the almond milk. Whisk the mixture thoroughly to ensure that the thickening agent is well-dissolved. This step is crucial for getting the right yogurt consistency. #### 2. Heat the Mixture Set your Instant Pot to the ‘Saute’ setting to heat the almond milk mixture. Stir frequently to prevent the milk from scorching. Heat until the mixture reaches approximately 185°F (85°C). This process helps to break down proteins and ensure consistency. #### 3. Cool the Mixture Turn off the Instant Pot and allow the almond milk mixture to cool down to about 110°F (43°C). You can speed up this process by placing the inner pot in a cold water bath. Use a thermometer to check the temperature – this is important as adding the yogurt starter to a mixture that’s too hot can kill the beneficial bacteria. #### 4. Add the Yogurt Starter Once the mixture cooled to the appropriate temperature, add the probiotic yogurt starter or dairy-free yogurt. Whisk thoroughly to ensure the starter is evenly distributed. Adding sweetener at this stage is optional but can enhance the flavor of your yogurt. #### 5. Incubate the Yogurt Select the ‘Yogurt’ setting on your Instant Pot. Secure the lid (no need to seal, as pressure is not required) and set the time for 8-12 hours. Longer incubation results in tangier yogurt. You can use Instant Pot-compatible glass jars at this stage for convenient storage later. #### 6. Chill and Enjoy Once the incubation period is complete, carefully transfer the yogurt into glass containers and refrigerate for at least 4 hours. This chilling period helps the yogurt to set properly. ### Tips for Perfect Homemade Almond Milk Yogurt: – Use unsweetened almond milk for best results. – Ensure your Instant Pot and utensils are thoroughly clean to avoid contamination. – Experiment with different incubation times to find your perfect tanginess level. ### Conclusion Making almond milk yogurt at home using an Instant Pot is a rewarding and straightforward process. This dairy-free delight is perfect for those with dietary restrictions or anyone looking to enjoy a healthier yogurt alternative. Give it a try, and you might never go back to store-bought yogurt again. Happy yogurt-making!