Search

Best Ways to Cook Different Types of Beans for Flavor

The Ultimate Guide to Beans and the Best Ways to Cook Them

Beans are a versatile and nutrient-packed ingredient that can elevate a variety of dishes. Whether you’re a seasoned chef or a home cook, understanding the different types of beans and how to cook them can make a huge difference in your culinary creations. Let’s delve into the diverse world of beans and uncover the best ways to prepare them.

Types of Beans

Black Beans

Black beans, also known as turtle beans, have a rich flavor and a velvety texture. They are commonly used in Latin American and Caribbean cuisines.

Kidney Beans

Kidney beans are large and kidney-shaped, with a robust flavor and dense texture. They are a staple in chili and other hearty dishes.

Pinto Beans

Pinto beans are recognizable by their beige color with reddish-brown specks. They become a pink hue when cooked and have a creamy texture.

Garbanzo Beans (Chickpeas)

Garbanzo beans, also known as chickpeas, are round, beige beans. They are an essential ingredient in Middle Eastern and Mediterranean dishes.

Navy Beans

Navy beans, also called pea beans, are small and white. They have a mild flavor and are often used in soups and stews.

Lima Beans

Lima beans, also known as butter beans, have a starchy yet buttery texture. They are popular in Southern cuisine.

Best Ways to Cook Beans

Soaking Methods

  • Overnight Soak: This is the most traditional method. Place beans in a large bowl and cover them with water by at least three inches. Let them soak overnight, or for about 8-12 hours.
  • Quick Soak: If you’re short on time, this method is quicker. Boil a pot of water, add the beans, and let them boil for 2-3 minutes. Remove from heat, cover, and let them soak for one hour.
  • Cooking Methods

  • Stovetop: Once soaked, drain the beans and transfer them to a large pot. Cover with fresh water and bring to a boil. Reduce the heat and let them simmer until tender. This can take anywhere from 1-2 hours, depending on the type of bean.
  • Slow Cooker: For a hands-off approach, use a slow cooker. Add soaked beans and enough water to cover them. Cook on low for 6-8 hours.
  • Pressure Cooker: Using a pressure cooker significantly reduces cooking time. Add soaked beans and fresh water, then cook on high pressure for 20-30 minutes, depending on the bean variety.
  • Flavor Boosters

    Aromatics

    Adding aromatics can significantly enhance the flavor of cooked beans. Consider using:

  • Onions
  • Garlic
  • Bay Leaves
  • Carrots
  • Celery
  • Herbs and Spices

    Spices and herbs can also add a fantastic depth of flavor. Common additions include:

  • Cumin
  • Thyme
  • Oregano
  • Smoked Paprika
  • Popular Bean Dishes

    Black Bean Soup

    This hearty soup is a staple in many cultures. Combine black beans with onions, garlic, bell peppers, and various spices for a delicious, comforting meal.

    Classic Chili

    Kidney beans are essential in classic chili recipes. Simmer them with ground meat, tomatoes, chili peppers, and a blend of spices for a warming dish.

    Refried Beans

    Pinto beans are often used to make refried beans. Cook them until tender, then mash and fry them with onions, garlic, and a bit of lard or oil.

    Hummus

    Garbanzo beans are the main ingredient in hummus. Blend them with tahini, garlic, lemon juice, and olive oil for a creamy, flavorful dip.

    Bean and Ham Soup

    Navy beans work wonderfully in soups. Combine them with ham, carrots, celery, and onions for a filling, traditional dish.

    Lima Bean Succotash

    Mix lima beans with corn, bell peppers, and tomatoes for a vibrant and tasty succotash.

    Nutritional Benefits

    Beans are not only versatile in the kitchen but also packed with nutrients. They are an excellent source of:

  • Protein: Essential for muscle repair and growth.
  • Fiber: Aids in digestion and helps maintain a healthy weight.
  • Vitamins: Beans offer a range of vitamins, including B vitamins, which are crucial for energy production.
  • Minerals: Key minerals such as iron, magnesium, and potassium are abundant in beans.
  • Antioxidants: Compounds that protect against cellular damage and reduce the risk of chronic diseases.
  • Tips for Perfect Beans

    Avoid Adding Acidic Ingredients Early

    Acidic ingredients like tomatoes or vinegar can toughen the bean skins if added too early. Wait until the beans are nearly cooked before adding these ingredients.

    Check for Doneness

    Taste a few beans to check for doneness. They should be tender but not mushy. Cooking times can vary based on the age and type of bean.

    Conclusion

    Exploring the world of beans can elevate your cooking and introduce you to new textures and flavors. From the rich and velvety black beans to the creamy and mild navy beans, each variety offers unique culinary possibilities. By understanding the best ways to soak, cook, and flavor beans, you can create a multitude of delicious and nutritious dishes. So go ahead, embrace the versatility of beans and make them a staple in your kitchen!


    Get our best recipes & expert tips right into your inbox!

    Join over 10k subscribers

    By submitting above, you agree to our privacy policy.

    You might also like

    Delicious Homemade Almond Milk Yogurt Recipe Using Instant Pot --- Are you in search of a dairy-free yogurt alternative that's both delicious and healthy? Look no further! With the help of your Instant Pot, you can now create perfectly creamy almond milk yogurt at home. Not only is this homemade version free from additives and preservatives, but it's also incredibly easy to make. Here's a step-by-step guide to get you started on your culinary adventure. ### Ingredients You’ll Need: - 4 cups of unsweetened almond milk - 1-2 tablespoons of agar-agar or gelatin (for thickening) - 2 tablespoons of probiotic yogurt starter or dairy-free yogurt - 1-2 tablespoons of maple syrup or honey (optional) ### Equipment: - Instant Pot with yogurt setting - Whisk - Instant Pot-compatible glass jars (optional but recommended) ### Step-by-Step Instructions: #### 1. Prepare the Almond Milk Mixture Firstly, pour the unsweetened almond milk into your Instant Pot. If you’re using agar-agar or gelatin, sprinkle it into the almond milk. Whisk the mixture thoroughly to ensure that the thickening agent is well-dissolved. This step is crucial for getting the right yogurt consistency. #### 2. Heat the Mixture Set your Instant Pot to the 'Saute' setting to heat the almond milk mixture. Stir frequently to prevent the milk from scorching. Heat until the mixture reaches approximately 185°F (85°C). This process helps to break down proteins and ensure consistency. #### 3. Cool the Mixture Turn off the Instant Pot and allow the almond milk mixture to cool down to about 110°F (43°C). You can speed up this process by placing the inner pot in a cold water bath. Use a thermometer to check the temperature - this is important as adding the yogurt starter to a mixture that's too hot can kill the beneficial bacteria. #### 4. Add the Yogurt Starter Once the mixture cooled to the appropriate temperature, add the probiotic yogurt starter or dairy-free yogurt. Whisk thoroughly to ensure the starter is evenly distributed. Adding sweetener at this stage is optional but can enhance the flavor of your yogurt. #### 5. Incubate the Yogurt Select the 'Yogurt' setting on your Instant Pot. Secure the lid (no need to seal, as pressure is not required) and set the time for 8-12 hours. Longer incubation results in tangier yogurt. You can use Instant Pot-compatible glass jars at this stage for convenient storage later. #### 6. Chill and Enjoy Once the incubation period is complete, carefully transfer the yogurt into glass containers and refrigerate for at least 4 hours. This chilling period helps the yogurt to set properly. ### Tips for Perfect Homemade Almond Milk Yogurt: - Use unsweetened almond milk for best results. - Ensure your Instant Pot and utensils are thoroughly clean to avoid contamination. - Experiment with different incubation times to find your perfect tanginess level. ### Conclusion Making almond milk yogurt at home using an Instant Pot is a rewarding and straightforward process. This dairy-free delight is perfect for those with dietary restrictions or anyone looking to enjoy a healthier yogurt alternative. Give it a try, and you might never go back to store-bought yogurt again. Happy yogurt-making!

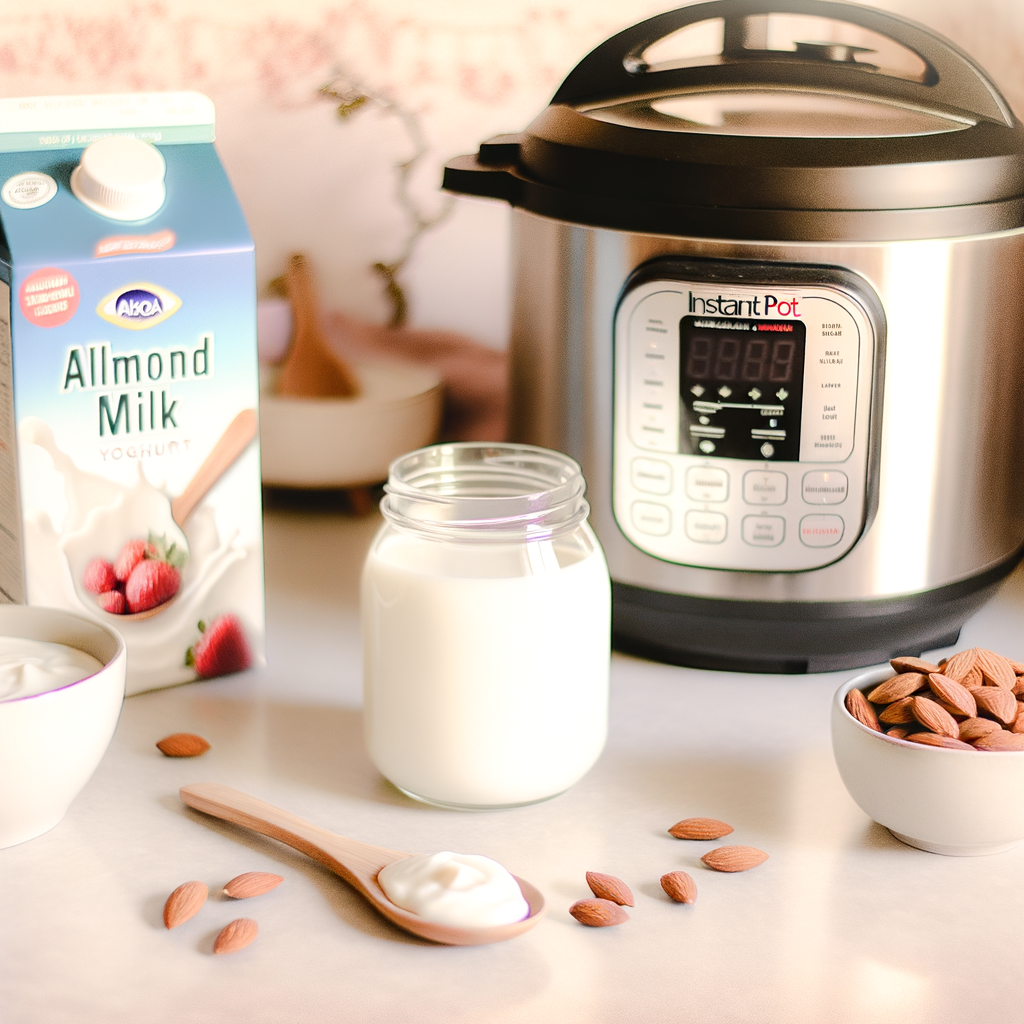
    Delicious Homemade Almond Milk Yogurt Recipe Using Instant Pot — Are you in search of a dairy-free yogurt alternative that’s both delicious and healthy? Look no further! With the help of your Instant Pot, you can now create perfectly creamy almond milk yogurt at home. Not only is this homemade version free from additives and preservatives, but it’s also incredibly easy to make. Here’s a step-by-step guide to get you started on your culinary adventure. ### Ingredients You’ll Need: – 4 cups of unsweetened almond milk – 1-2 tablespoons of agar-agar or gelatin (for thickening) – 2 tablespoons of probiotic yogurt starter or dairy-free yogurt – 1-2 tablespoons of maple syrup or honey (optional) ### Equipment: – Instant Pot with yogurt setting – Whisk – Instant Pot-compatible glass jars (optional but recommended) ### Step-by-Step Instructions: #### 1. Prepare the Almond Milk Mixture Firstly, pour the unsweetened almond milk into your Instant Pot. If you’re using agar-agar or gelatin, sprinkle it into the almond milk. Whisk the mixture thoroughly to ensure that the thickening agent is well-dissolved. This step is crucial for getting the right yogurt consistency. #### 2. Heat the Mixture Set your Instant Pot to the ‘Saute’ setting to heat the almond milk mixture. Stir frequently to prevent the milk from scorching. Heat until the mixture reaches approximately 185°F (85°C). This process helps to break down proteins and ensure consistency. #### 3. Cool the Mixture Turn off the Instant Pot and allow the almond milk mixture to cool down to about 110°F (43°C). You can speed up this process by placing the inner pot in a cold water bath. Use a thermometer to check the temperature – this is important as adding the yogurt starter to a mixture that’s too hot can kill the beneficial bacteria. #### 4. Add the Yogurt Starter Once the mixture cooled to the appropriate temperature, add the probiotic yogurt starter or dairy-free yogurt. Whisk thoroughly to ensure the starter is evenly distributed. Adding sweetener at this stage is optional but can enhance the flavor of your yogurt. #### 5. Incubate the Yogurt Select the ‘Yogurt’ setting on your Instant Pot. Secure the lid (no need to seal, as pressure is not required) and set the time for 8-12 hours. Longer incubation results in tangier yogurt. You can use Instant Pot-compatible glass jars at this stage for convenient storage later. #### 6. Chill and Enjoy Once the incubation period is complete, carefully transfer the yogurt into glass containers and refrigerate for at least 4 hours. This chilling period helps the yogurt to set properly. ### Tips for Perfect Homemade Almond Milk Yogurt: – Use unsweetened almond milk for best results. – Ensure your Instant Pot and utensils are thoroughly clean to avoid contamination. – Experiment with different incubation times to find your perfect tanginess level. ### Conclusion Making almond milk yogurt at home using an Instant Pot is a rewarding and straightforward process. This dairy-free delight is perfect for those with dietary restrictions or anyone looking to enjoy a healthier yogurt alternative. Give it a try, and you might never go back to store-bought yogurt again. Happy yogurt-making!