Search

Delicious Vegan Chicken Nuggets Recipe That Everyone Will Love

Deliciously Simple Vegan Chicken Nuggets Recipe

Vegan chicken nuggets have quickly become a favorite for those looking to enjoy a plant-based diet without compromising on flavor or texture. These nuggets are another testament that vegan food can be incredibly delicious and satisfying. Not only are these nuggets delectable, but they are also healthier and environmentally friendly. In this post, we’ll guide you through a simple yet scrumptious vegan chicken nugget recipe that you can whip up in your kitchen.

Why Choose Vegan Chicken Nuggets?

Choosing to eat vegan chicken nuggets benefits not just your health, but also the environment. Here are a few reasons why these nuggets should be on your menu:

  • Healthier Alternative: Vegan chicken nuggets are often lower in fat and cholesterol compared to their meat counterparts.
  • Environmental Impact: Plant-based foods generally have a smaller carbon footprint.
  • Animal Welfare: Reducing the consumption of animal-based products helps to promote more humane farming practices.

Ingredients You’ll Need

Before you start cooking, gather all your ingredients. These vegan chicken nuggets are made with wholesome ingredients that are easy to find. Here is what you’ll need:

  • 1 block of extra-firm tofu: Ensure it is well-pressed to remove excess water.
  • 1 cup of chickpea flour: For the batter.
  • 1 cup of water: To mix with the chickpea flour.
  • 1 cup of breadcrumbs: Use gluten-free if necessary.
  • 1 tsp of garlic powder: For flavor.
  • 1 tsp of onion powder: To enhance taste.
  • 1 tsp of smoked paprika: Adds a smoky flavor.
  • Salt and pepper: To taste.
  • 2 tbsp of nutritional yeast: For a cheesy flavor.
  • 1 tbsp of Dijon mustard: Adds tanginess.
  • Oil for frying or baking: Use your favorite cooking oil.

Optional Ingredients

You can customize your nuggets with various optional ingredients to suit your taste preferences. Some great additions include:

  • 1 tsp of Italian seasoning: For a herbaceous touch.
  • A pinch of cayenne pepper: If you like them spicy.
  • 1 tbsp of soy sauce or tamari: For umami flavor.

Step-by-Step Cooking Instructions

Now that you have all your ingredients, let’s dive into the cooking process:

Step 1: Prepare the Tofu

  • Press the tofu: Wrap the tofu block in paper towels or a clean kitchen towel. Place a heavy object on top to press out excess water for at least 20 minutes.
  • Cube the tofu: Cut the pressed tofu into nugget-sized cubes or strips.

Step 2: Make the Batter

  • Combine dry ingredients: In a large mixing bowl, whisk together chickpea flour, garlic powder, onion powder, smoked paprika, salt, pepper, and nutritional yeast.
  • Add wet ingredients: Gradually add water and Dijon mustard to the dry mixture, stirring continuously until you get a smooth, thick batter.

Step 3: Bread the Nuggets

  • Coat with batter: Dip each tofu piece into the chickpea batter, ensuring it is fully coated.
  • Cover with breadcrumbs: Roll the battered tofu pieces in breadcrumbs until they are fully covered.

Step 4: Cooking the Nuggets

You can choose to either bake or fry the nuggets based on your preference.

  • Frying: Heat oil in a pan over medium-high heat. Fry the nuggets until golden brown and crispy, approximately 2-3 minutes per side. Place them on paper towels to drain excess oil.
  • Baking: Preheat your oven to 400°F (200°C). Line a baking sheet with parchment paper and lightly coat with oil. Bake for 20-25 minutes, flipping halfway through, until the nuggets are crispy and golden.

Serving Suggestions

These vegan chicken nuggets are incredibly versatile and can be enjoyed in numerous ways. Here are some serving ideas:

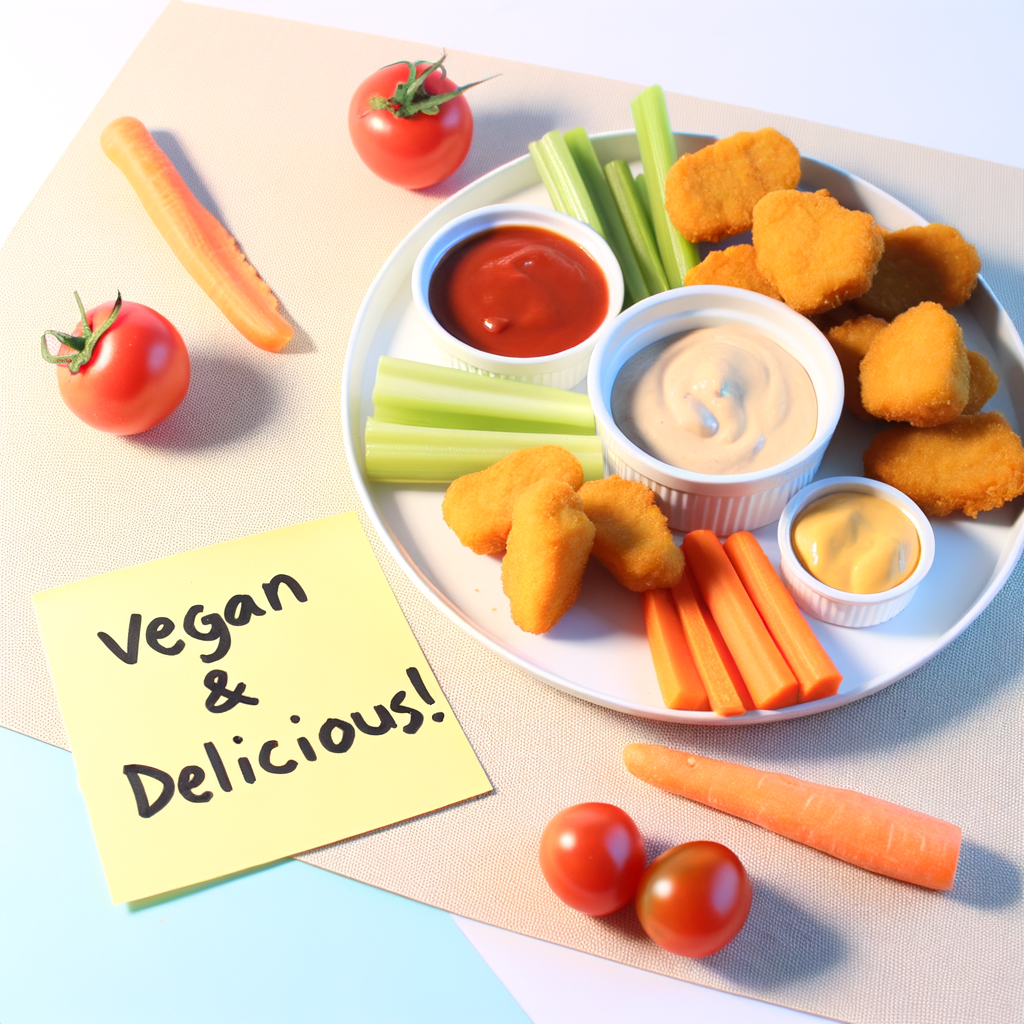
  • With Dips: Serve with your favorite dips such as ketchup, BBQ sauce, vegan ranch, or honey mustard.
  • In Wraps: Add them to a tortilla with fresh veggies and a drizzle of sauce for a delicious wrap.
  • As a Salad Topper: Use them as a crunchy topping for your salads.
  • With Fries: Pair them with sweet potato fries or classic French fries for a classic combination.

Storage and Reheating Tips

If you have leftovers, here’s how to store and reheat your vegan chicken nuggets:

  • Refrigeration: Store the nuggets in an airtight container in the refrigerator for up to 4 days.
  • Freezing: Freeze the cooked nuggets in a single layer on a baking sheet. Once frozen, transfer them to a freezer-safe bag. They can be stored for up to 2 months.
  • Reheating: Reheat in the oven at 375°F (190°C) for 10-15 minutes, or until heated through and crispy. Avoid microwaving as it can make the nuggets soggy.

Conclusion

Making vegan chicken nuggets at home is easy, fun, and rewarding. This recipe not only provides a delicious and healthier alternative to traditional chicken nuggets but also opens the door to endless customization and creativity in your plant-based cooking journey. So why wait? Gather your ingredients and dive into the world of crispy, tasty vegan nuggets. Enjoy!

Get our best recipes & expert tips right into your inbox!

Join over 10k subscribers

By submitting above, you agree to our privacy policy.

You might also like

Delicious Homemade Almond Milk Yogurt Recipe Using Instant Pot --- Are you in search of a dairy-free yogurt alternative that's both delicious and healthy? Look no further! With the help of your Instant Pot, you can now create perfectly creamy almond milk yogurt at home. Not only is this homemade version free from additives and preservatives, but it's also incredibly easy to make. Here's a step-by-step guide to get you started on your culinary adventure. ### Ingredients You’ll Need: - 4 cups of unsweetened almond milk - 1-2 tablespoons of agar-agar or gelatin (for thickening) - 2 tablespoons of probiotic yogurt starter or dairy-free yogurt - 1-2 tablespoons of maple syrup or honey (optional) ### Equipment: - Instant Pot with yogurt setting - Whisk - Instant Pot-compatible glass jars (optional but recommended) ### Step-by-Step Instructions: #### 1. Prepare the Almond Milk Mixture Firstly, pour the unsweetened almond milk into your Instant Pot. If you’re using agar-agar or gelatin, sprinkle it into the almond milk. Whisk the mixture thoroughly to ensure that the thickening agent is well-dissolved. This step is crucial for getting the right yogurt consistency. #### 2. Heat the Mixture Set your Instant Pot to the 'Saute' setting to heat the almond milk mixture. Stir frequently to prevent the milk from scorching. Heat until the mixture reaches approximately 185°F (85°C). This process helps to break down proteins and ensure consistency. #### 3. Cool the Mixture Turn off the Instant Pot and allow the almond milk mixture to cool down to about 110°F (43°C). You can speed up this process by placing the inner pot in a cold water bath. Use a thermometer to check the temperature - this is important as adding the yogurt starter to a mixture that's too hot can kill the beneficial bacteria. #### 4. Add the Yogurt Starter Once the mixture cooled to the appropriate temperature, add the probiotic yogurt starter or dairy-free yogurt. Whisk thoroughly to ensure the starter is evenly distributed. Adding sweetener at this stage is optional but can enhance the flavor of your yogurt. #### 5. Incubate the Yogurt Select the 'Yogurt' setting on your Instant Pot. Secure the lid (no need to seal, as pressure is not required) and set the time for 8-12 hours. Longer incubation results in tangier yogurt. You can use Instant Pot-compatible glass jars at this stage for convenient storage later. #### 6. Chill and Enjoy Once the incubation period is complete, carefully transfer the yogurt into glass containers and refrigerate for at least 4 hours. This chilling period helps the yogurt to set properly. ### Tips for Perfect Homemade Almond Milk Yogurt: - Use unsweetened almond milk for best results. - Ensure your Instant Pot and utensils are thoroughly clean to avoid contamination. - Experiment with different incubation times to find your perfect tanginess level. ### Conclusion Making almond milk yogurt at home using an Instant Pot is a rewarding and straightforward process. This dairy-free delight is perfect for those with dietary restrictions or anyone looking to enjoy a healthier yogurt alternative. Give it a try, and you might never go back to store-bought yogurt again. Happy yogurt-making!

Delicious Homemade Almond Milk Yogurt Recipe Using Instant Pot — Are you in search of a dairy-free yogurt alternative that’s both delicious and healthy? Look no further! With the help of your Instant Pot, you can now create perfectly creamy almond milk yogurt at home. Not only is this homemade version free from additives and preservatives, but it’s also incredibly easy to make. Here’s a step-by-step guide to get you started on your culinary adventure. ### Ingredients You’ll Need: – 4 cups of unsweetened almond milk – 1-2 tablespoons of agar-agar or gelatin (for thickening) – 2 tablespoons of probiotic yogurt starter or dairy-free yogurt – 1-2 tablespoons of maple syrup or honey (optional) ### Equipment: – Instant Pot with yogurt setting – Whisk – Instant Pot-compatible glass jars (optional but recommended) ### Step-by-Step Instructions: #### 1. Prepare the Almond Milk Mixture Firstly, pour the unsweetened almond milk into your Instant Pot. If you’re using agar-agar or gelatin, sprinkle it into the almond milk. Whisk the mixture thoroughly to ensure that the thickening agent is well-dissolved. This step is crucial for getting the right yogurt consistency. #### 2. Heat the Mixture Set your Instant Pot to the ‘Saute’ setting to heat the almond milk mixture. Stir frequently to prevent the milk from scorching. Heat until the mixture reaches approximately 185°F (85°C). This process helps to break down proteins and ensure consistency. #### 3. Cool the Mixture Turn off the Instant Pot and allow the almond milk mixture to cool down to about 110°F (43°C). You can speed up this process by placing the inner pot in a cold water bath. Use a thermometer to check the temperature – this is important as adding the yogurt starter to a mixture that’s too hot can kill the beneficial bacteria. #### 4. Add the Yogurt Starter Once the mixture cooled to the appropriate temperature, add the probiotic yogurt starter or dairy-free yogurt. Whisk thoroughly to ensure the starter is evenly distributed. Adding sweetener at this stage is optional but can enhance the flavor of your yogurt. #### 5. Incubate the Yogurt Select the ‘Yogurt’ setting on your Instant Pot. Secure the lid (no need to seal, as pressure is not required) and set the time for 8-12 hours. Longer incubation results in tangier yogurt. You can use Instant Pot-compatible glass jars at this stage for convenient storage later. #### 6. Chill and Enjoy Once the incubation period is complete, carefully transfer the yogurt into glass containers and refrigerate for at least 4 hours. This chilling period helps the yogurt to set properly. ### Tips for Perfect Homemade Almond Milk Yogurt: – Use unsweetened almond milk for best results. – Ensure your Instant Pot and utensils are thoroughly clean to avoid contamination. – Experiment with different incubation times to find your perfect tanginess level. ### Conclusion Making almond milk yogurt at home using an Instant Pot is a rewarding and straightforward process. This dairy-free delight is perfect for those with dietary restrictions or anyone looking to enjoy a healthier yogurt alternative. Give it a try, and you might never go back to store-bought yogurt again. Happy yogurt-making!